Most of us probably have digital photos all over the place; on laptops, phones, cameras, discs and external drives. We may also have photographs in frames, albums or on slides, especially those of us over 40. Wouldn’t it be great if we could put them all in one place and share some of them with relatives and friends for free? The good news is that we can, using Google Photos. This post looks at how easy it is to use Google Photos to organize old images.
Using Google Photos
Getting started
You’ll need a Google account to use this service, so if you don’t have one already, you’ll have to set one up. To do this, go to the Google search page, click on “Sign in”, then “Create account” (select the “For myself” option). Complete the boxes and you’re ready to go.
To get started, click on the Google Apps icon (9 dots) on the top right of any Google page and scroll down until you find Google Photos. Alternatively, just search for “Google Photos”.
Create Album
The best way to organize old images is to create albums on Google Photos. Select “Albums” from the menu on the main page. Then select “Create album”:
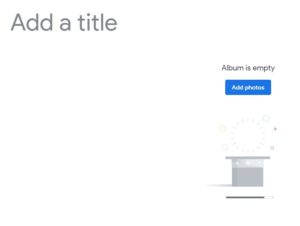
Create Album on Google Photos
Give the album a name. Click on the “Add photos” button, then “Select from computer”
The first time you upload photos, it will ask you which upload size you want:
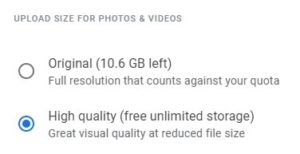
Upload option on Google Photos
To get free unlimited storage, you need to select the “High Quality” option. Your images will be compressed, but not so that you notice any difference. I find these images perfectly acceptable.
If you want to keep the existing image size, select “Original”. However, if you do this, you’ll have limited free storage (up to 15 GB). You’ll then have to pay for any additional storage. If you’re a professional who needs high resolution images, then you will need this option. But for the rest of us, the “High Quality” option is fine.
Editing the Meta Data
Select an image and you can edit the meta data by clicking on the “I” icon:
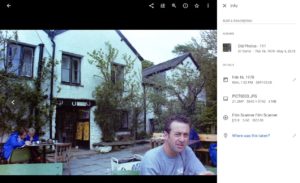
Editing Meta Data on Google Photos
You can write a description, change the date and add a location. If the picture was taken with a digital camera or a smart phone, the meta data may already contain the correct date and location. If it’s a scanned image, like this one, it won’t.
Basic editing
You can do some basic editing with the image like adjusting the brightness and color as well as adding some filters. It’s not Photoshop, but you can improve an old image a bit.
Sharing
You can share an image by selecting the Share icon above it. You can share it on Facebook or Twitter or you can create a link to send to someone.
You can also share complete albums. As a genealogist, I think that this is the best feature. You can share an album with your relatives who can enjoy your old photos as well as adding their own. This type of collaboration can build up a library of family history images that can be very useful for your research.
To share an album, simply click on the share icon in the album page and create a link which you can email to your fellow collaborators.
Digitizing old photos
This article has focused on digital images. If you have photos that you need to digitize, see Digitize Slides Using a Film Scanner. In this post I showed how I digitized all my old 35mm photo slides and negatives using a low-cost film scanner with quite good results.
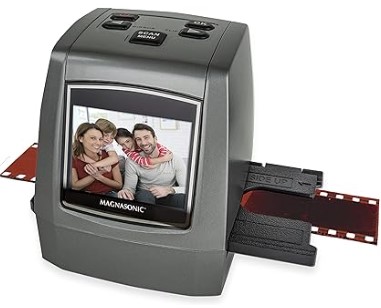
The scanner I use is similar to this one (the same scanner is available with different brand names):
Magnasonic All-in-One High Resolution 22MP Film Scanner
There are also some more digitizing options on: How to Digitize Old Media Yourself.
Happy organizing!
Please pin a pin to Pinterest:







Thank you for the great information- to bad I can’t use it. No pictures are available on my husbands side of the family & I was adopted definitely no family pictures for that side either.
Thanks for your comment Erica. Too bad you can’t use it for this.