Using an inexpensive film scanner is a cost effective way to digitize slides and negatives. This post takes you through the process I use to digitize slides and negatives using the film scanner I recently purchased.
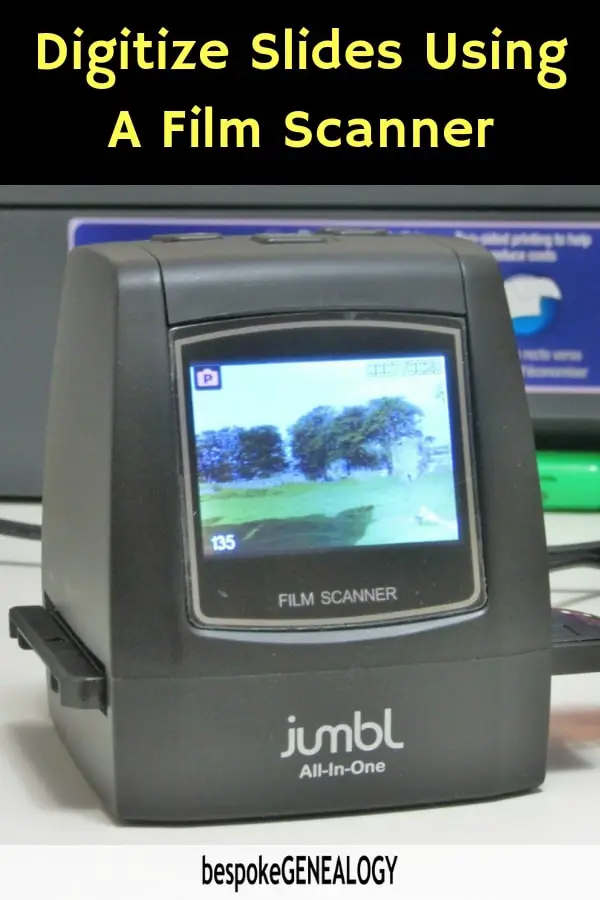
Like many people over the age of forty, I have hundreds, if not thousands, of pre-digital slides and negatives I want to digitize. Film deteriorates over time so converting them to a digital format effectively protects the images from decay as well as from fire and flood, especially if they are backed up and saved in the Cloud. It would probably cost me thousands of dollars to get my photos converted professionally, so I digitize slides and old film negatives myself using a film scanner at a fraction of the cost.
I’ve recently been digitizing my old 35mm colour slides and print negatives and getting good results. If you are thinking about doing this too, here is what I do, and use, so you can see how easy and relatively inexpensive it is to do.
What I use to digitize slides and negatives
I use a jumbl All In One Film Scanner, but there are other similar ones available on the market (see below). I’ll describe how the “jumbl” works in this post, and I believe some of the others work in a similar way. However, you should verify before your purchase. The jumbl is currently unavailable. However, the Magnasonic 22MP is a very similar model.
See the Magnasonic 22MP on Amazon here
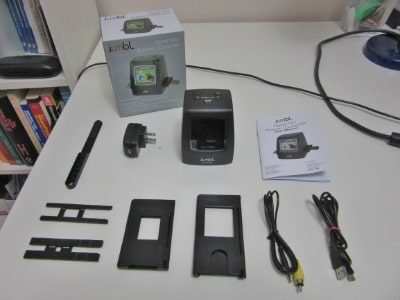
The jumbl film scanner with provided accessories
The jumbl film scanner can convert 35mm, 126KPK, 110 and Super 8 (cine) negatives to jpegs which can be saved onto your computer. The device comes with:
- 35mm slide holder
- 35mm film negative holder
- 110 film negative holder
- Super 8 film holder
- USB to mini USB lead
- TV Cable
- Mains power plug
- Cleaning brush
- Instruction manual
The jumbl is a stand alone device so it doesn’t need to be connected to a computer to work. This is ideal if you want to take it somewhere, say to visit an elderly relative to scan their slide or photo collection. It has a built in memory that can store up to 50 images, however this won’t be enough if you have a lot of slides to scan in one session. There is a slot for an SD card, so I do recommend that you get one as you will be able to store a lot more pictures.
The film scanner can be powered either directly from a wall socket using the plug provided and the USB cable or you can just plug the USB cable into your computer. I recommend doing this so that you can easily transfer files.
How to use the film scanner
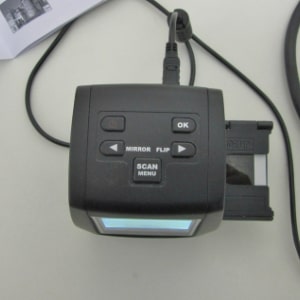
jumbl film scanner controls
The device is very easy to use once you have read the simple manual. Everything is done on the jumbl’s screen using the arrow buttons on the top to navigate the short menu.
Start by selecting the film type, then insert the correct holder and feed in the slides or negatives and scan each frame by pressing “OK”.
Before each scan, you can edit the image by adjusting the exposure and color levels. However, I found that the screen is too small to be able to meaningfully do this, so I find it much better to scan using the default settings and then edit later (if you need to) on your computer (see below).
So far, I have converted all of my slides and some of my negatives. This is an example of a 35mm slide conversion:

Picture taken in 1989 at the Beamish Industrial Museum in Northern England.
This picture has not been edited and was converted using the jumbl’s default settings.
Here is an example of a negative conversion:

I took this picture in 1987 in the Lake District, England.
Again, this picture has not been edited and was scanned using the default settings. Once the film negative option is selected on the menu before you scan, the device automatically flips the negative to a positive image.
Once you have finished a scanning session, you can easily transfer the images over to your computer using the USB lead. You just select the “USB MSDC” option on the menu, press “OK” and your computer will detect the jumble as an external drive.
You can also select the “Playback” option on the menu and view the images on the screen. Alternatively, you can connect the jumbl to a TV using the cable provided to view the images.

Picture after adjusting levels in Photoshop Elements
Some of my pictures were under or over exposed when they were taken, so editing can improve them. I now use Photoshop Elements for this, mostly changing the levels of brightness, contrast and tonal range.
Here is the same picture after a bit of an adjustment in Photoshop Elements.
With the combination of the jumbl and Photoshop Elements, I’m getting very satisfactory results with my old pictures, many of them taken 40 or more years ago.
Photoshop Elements can be purchased direct from Adobe here.
I also recommend that you clean your films with compressed air before you scan to get the best results.
You should also regularly clean the lens on the jumbl with the brush provided.
My only criticism with the jumbl is that you have to control the scanning from the device itself; I would like to be able to do it from my computer like I do with my flat bed scanner. However, this is only a minor criticism; it works very well, it produces good results, is very simple to use and is reasonably priced. I have no problem recommending it.
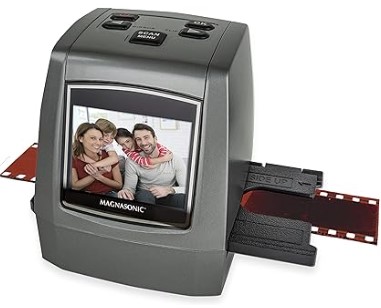
The jumbl film scanner is currently unavailable. The Magnasonic 22MP is an almost identical product:
Magnasonic 22MP Film Scanner
If you need an SD card:
See this product on Amazon here
For me, the results that I’m getting with the jumbl film scanner are more than adequate and have been better than expected considering the age of my slides and negatives. However, I do recognize that the images are not high definition. If that’s what you’re looking for, you will probably need to go for a more expensive scanner.
See my previous post about digitizing other media.
Happy scanning!
Please pin a pin to your Pinterest board:


So it’s not free then, about £100 for the scanner!
…this is a fraction of the cost of getting my photos professionally digitized as I mentioned in the first paragraph.
The cheapest price I’ve found for getting slides and negatives digitized professionally is 20c a frame (plus shipping costs). So $100 would pay for about 500 frames at a professional processor. 500 frames is the equivalent of 14 rolls of film (36 exposures). If someone has 14 rolls or less to process, then maybe it’s cheaper to go to a processor. Many people will have a lot more than 14 rolls to process; I personally have more than 300 rolls taken over more than 20 years, so I’m saving big bucks with the method in the post.
Thank you Alistair McGowen for this information. I have a bag full of negitives from maybe 30 years ago & have been wanting to get this saved on my computer & organized before I’m not able anymore. Blessings to you and yours.
You’re welcome. Good luck with your digitizing!
Some really fantastic work on behalf of the owner of this site, absolutely outstanding content material.
Thank you
My motivation for using the film scanner had more to do with being able to choose which frames I wanted instead of sending them off and getting a lot of things I didn’t want. I also had old super 8 movie films that I wanted pictures from that I had no photos of the occasion otherwise. It worked great and was faster after I used old film viewer with hand cranks with the little box in between the spools, AND plugged the cord for tv viewing into an old dvd player screen giving me a decent preview screen. Wonderful. and the results were so much better than expected.
Thanks Cheryl. Great idea to use and old DVD player screen for previewing!
The dvd screen isn’t the sharpest, but sure helps more than the tiny screen that comes with the unit. I tried a bigger tv screen first but it was so big I mainly just got square looking pixels. Also the screen on the unit only displayed in a vertical view for some reason and I had to find something else to keep from hurting my neck looking at it sideways.
Personally, I found the screen on the Jumbl good enough to see the image and make sure that it was positioned correctly. As you mention, the unit assumes all images are landscape and you can’t switch to portrait view on the screen. However, once I had saved the scanned images, I uploaded the ones I wanted to keep to the free site https://www.befunky.com/ and edited them there. On befunky the image can be rotated if needed and the tools can be used to enhance the pics.
Thank you for this post! I have all the family photo negatives and this is ideal for saving most of the images. *Can the Jumbl also be used for older negatives from the 1930’s-50’s? They are much larger and are of photos that have been lost. They are the ones I would most like to preserve.
Hi Fiona, thanks for your comment. Unfortunately, 35mm is the largest format the jumbl can scan. For medium format film, you probably need a flat bed scanner like the Epson V600. See it on Amazon here: https://amzn.to/2X0NXZS
Good luck!
Thanks for this article. I will be trying this soon. I found a box of 35mm films. My mom said that dad was a photographer in their early years together and then he went to work for the Navy. I have no idea how many films are in these boxes or what they are of. I am hoping some of his parents and family when they were young. Thank you again for time and this great article
Thanks Lynne. Good luck with your scanning, hope you get some great results!
I have a question about the Epson V600. I bought that two years ago to scan photos or pagers while doing research when traveling. Would the Epson be a good one for 35mm slides and would I just lay them on the scanner? Thank you for your time knowledge.
The V600 should have come with a 35mm slide holder. See this useful video for more info: https://www.youtube.com/watch?v=xs7tmOyYpxk
Good luck!
We have been doing this, but it’s very slow going and it’s tiring to sit at the computer for a couple of hours. Still, it’s worthwhile to save all these pictures.
It is time consuming, but much cheaper than getting it done professionally. When I digitized my photos, I didn’t do them all at once, but spread them out over time, just doing a batch every evening.