Since my earlier post about digitizing old media, a few people have asked me for more information about how I digitize vinyl records. This post then is a run through on how I convert vinyl records to mp3 files and CDs.
I have several hundred vinyl records that I bought in the 1970s and 80s and for the last couple of years I’ve been slowly digitizing them and this is the method I use.
To digitize vinyl records I use the following:
- A standard record deck
- A USB pre-amp
- Audio software (free)
- My laptop
- Earphones
The USB pre-amp I’m using is a Behringer UFO202:

Note that you can use a USB record deck instead of a standard deck. If you do, you won’t need the separate pre-amp as this is already built into it. You just connect it straight into your computer.
Step 1 – Download the Audio Software
I’m using Audacity audio software. This is open source software and can be downloaded for free from the Audacity website here.
Audacity is pretty sophisticated for free software and if you want to read in depth about what it can do, there are training manuals on their website here.
Step 2 – Connect the components

My Behringer USB pre-amp connected to my record deck and PC
Plug the red and white RCA (phono) leads from your record deck into the red and white input sockets on the pre-amp. Then connect the pre-amp to your computer with the USB lead. Finally plug your earphones into the output on the pre-amp.
Step 3 – Clean your record
The record needs to be as clean as possible as dust and dirt will be carried over into the recording as crackles and even jumps. At the very least, it should be given the once over with a record cleaning cloth. If the record is stained, it may need cleaning with water and a light detergent. Make sure it is completely dry before playing.
Step 4 – Test the recording level
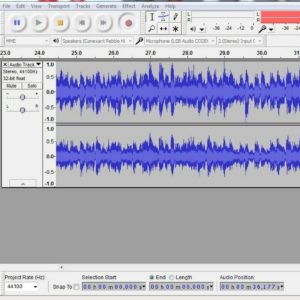
Audacity Screen – setting the levels
First make sure the Audacity microphone setting is set to USB Audio and 2 (Stereo) Input (see picture above).
I recommend that before you record anything you play the loudest track on the disc and check the sound levels on the Audacity screen. You need the peaks to be within the two bands, ie between 1.0 and -1.0 (see picture above). If you don’t do this, the recording is likely to sound distorted. You can adjust the levels using the slider controls.

Slider Controls
Once you are happy with the levels, you can start recording.
Step 5 – Record the first track
It is possible to record the whole of a side of an LP and then split it into tracks afterwards. However, I find this very fiddly and time consuming and therefore think it is easier to record one track at a time.
So, click on “record” and play the first track. Press stop when finished.
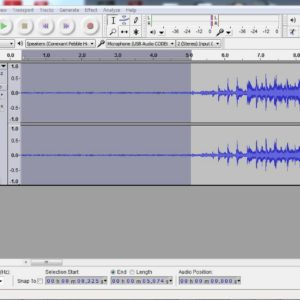
Editing on the Audacity Screen
Once recorded, you can play back and delete any unwanted footage at the beginning and end of the track by highlighting and cutting (using the scissor icon – top right on the picture)
Step 6 – Add Meta data and save recording
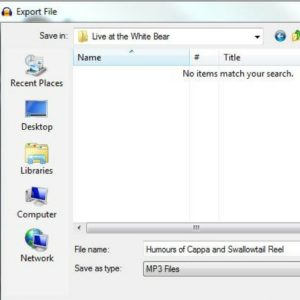
Name Track and Save
Once you have completed recording and editing the first track, create a folder on your computer (wherever you keep your music) and give it the artist’s name. Then create a sub-folder with the name of the album.
In Audacity, click on “File”, then “Export”. Find the sub folder and name the track. The track can be saved as an MP3 file or there are several other options including WAV and AIFF (Apple). I usually save as MP3. Click on “Save”.
Next, Audacity will ask you to add Meta data.
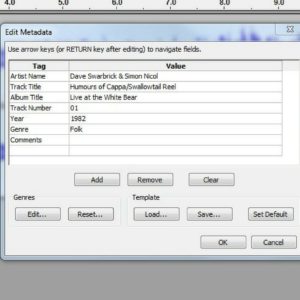
Add Meta Data
As a vinyl record is an analogue recording, it doesn’t contain any Meta data like a CD (artist name, album title etc). It therefore has to be added manually. The picture above shows the Meta data I added to a recording I did today.
Step 7 – Record the rest of the album
Repeat steps 5 and 6 until the album is complete. I find that it takes me about an hour to convert a 40 minute LP.
Step 8 – Check the media player
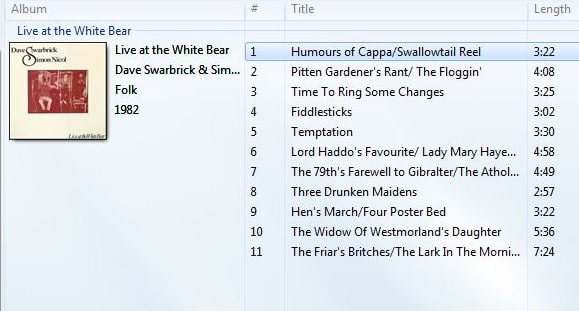
Newly digitized album on Windows Media Player
If you are using Windows Media Player (or the Apple Mac equivalent), you should find the album you’ve just digitized. If you haven’t been consistent with the Meta data for each track, you might see the recording spread over two or three folders. Just use your mouse to move them into one folder.
As long as you are connected to the internet, the media player should have automatically found the album cover. If not, you should be able to find the image on Google and then just copy and paste into your media player.
If you want to save the recording onto a CD with a nice cover, here are some additional steps:
Step 9 – Burn the recording onto a CD
Use your media player to burn the recording onto a CD. With Windows Media Player, it is a simple process of putting a blank disc into the CD drive, click on the Burn tab, drag the recording into that tab and click on “Start Burn”.
Step 10 – Create the Cover
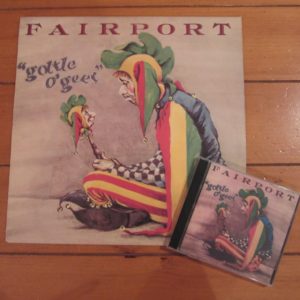
An album I recently digitized with the CD cover created from the original
The above picture shows an album I digitized earlier with the CD cover I recreated from the original. I bought some empty CD “jewel cases” and I have created a template on Excel for the back and front cover. In this case I took a picture of the album cover, cropped it, and inserted it into the template. I then just printed it and cut out the cover and inserted it into the “jewel case”.
In many cases, you should be able to find an album artwork by searching Google images.
If you’d like a free copy of the Excel template, sign up for updates to Bespoke Genealogy here and I’ll email the link. You can always “unsubscribe” at any time. If you are already signed up, you can still enter your name and email address and you’ll be sent the link.
USB Record Deck
If you have a collection of vinyl records , but nothing to play them on, then the best bet is to be to buy a USB record deck. These are great as you don’t need a complete hi-fi. You can plug the record deck directly into your computer and then follow the Audacity steps above.
If you are not too worried about sound quality, you’ll find cheaper USB decks on Amazon.
Happy digitizing!
Please pin a pin to your Pinterest board:


Leave A Comment